
How to Automate Investor Intake on Subscription Agreements STEP BY STEP
Too often, many people are overwhelmed with Fund Administration backend software and $100,000+ back offices with quantum physics-level complexity. This setup gets offered to new acquisitions entrepreneurs or fund administrators prior to them raising a cent from actual investors in the first place.
What if I told you for you to be able to compliantly intake many investors at scale via quick and simple DocuSign documents and a little bit of patience and focus.
In this video, I walk through step-by-step how to intake investors systematically using an online form.
Step 1. Work with pros to build and draft your sub docs
Step 2. Have legal review
Step 3. Close a few transactions
Step 4. (This video covers this) Systematize and Automate the investor attractions and intake process
Click Here to Subscribe to Raises.com on Youtube
We’re going to go through the step by step method with forensic detail about how you can subscribe investors into your subscription agreement and offering without any magic, crazy tools, or losing control over what’s going on and so take a look right now
At Raises.com we have armies of delegated assistants helping people do this at scale for multiple raises with detailed instructions (standard operating procedures) for multiple investor intake documents after securities attorney review. This reduces unneeded complexity, so people can focus on raising the capital and evade another (costly) distraction.
Transcript
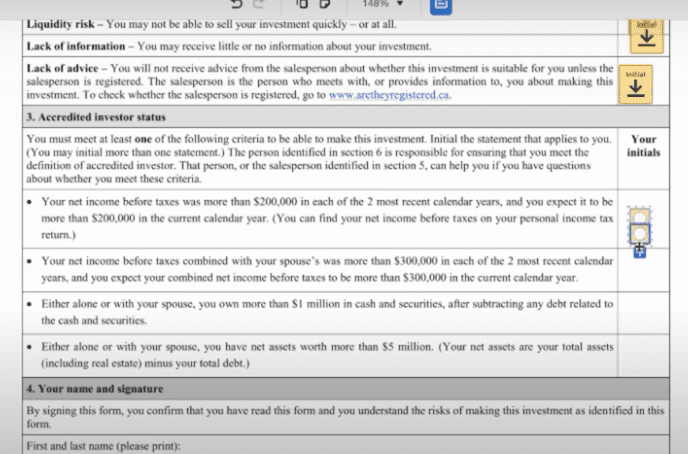
Speaker1: [00:00:00] Hi, everyone, Natu Myers is here. Back with another video and in this video, we’re going to go through how to use DocuSign science to set up an automated investor intake. So when it comes to subscription agreements and everything and. Real simple, the best plan, it seems, is the real estate plan, because you want to have reusable templates that you want to have shared templates for you to have a complete automated workflow. And we’ve used tons of these things. We use Pandadock, e sign genie and everything. But DocuSign is just the most universally recognized one, and it’s easiest to train other people to do it on your behalf as well. It’s also the best, most tested one that we know about and the most easy to use user interface. And so let’s get right into it. So click on Buy now for this one. Make sure you purchase one. Oh. Ok, so after you purchase it. Yes, after you purchase it, what do you want to do? You want to click on? And you want to just drop go to templates and we set up a template. And what do you want to do now is? Click on create templates. Who can add documents to your template? And click on the subscription agreements. This is a Canadian with the Canadian one, obviously. Click on Next. So there’s one placeholder and then there are two placeholders. And so typically of these documents, there’s the investor and then there is the person selling the investment. And so for simplicity, we could just have the investor, but we’ll do everything.
Speaker1: [00:03:24] We’ll have the person selling the deal and the investor usually sometimes there are multiple parties involved, but this one just has two parties here. Become subscriber. It’s more neutral language. So the subscriber enters in the information first, then you’re the one who signs off on it. And if you know the email of the person, you can actually answer any email of the person, but we’re just going to leave it open like this because this is just an example. So here we go, so rapidly followed in the certain logic, we’re going to add in the standard operating procedures, but I’m just going to fly by the logic that we have right now to get this filled out. So you want to put it in the name of the subscriber? So full name. So yellow means subscriber blue means principal principal is a person that’s selling a deal. So this is just a two person subscription agreement. This is a Canadian version. And here the data label, you want to say full name because this will be remembered for later on. This appears to be a little checkmark. It looks all optional, so just leave us alone. So here is the name of the subscriber. And so you want to take this and you want to just go here. Pasted Control V So I press Control C and Control V on Windows, on Mac, I press Command C and then Command V to paste it. And when you look at data label, you see that it’s different.
Speaker1: [00:05:11] There’s a bunch of gibberish behind it. Make sure it’s the same so that the data automatically copies. So you want to do that? By. So this is the signature. Remove all the gibberish behind it and just put signature. Click on required field to make it not required. It’s controlled secretly. So this is title. Can leave this alone. This is address, but an address here. This is phone. This is email. All right, and so put the email here. And so the number of units, so go here, put in units. When the amounts. And these things are on the right are all optional. So I’m just pasting it, and it’s all optional. This is all optional because sometimes people have to register the units with a with an account or whatever, but this is all optional stuff that isn’t always needed. All right. And so next, this is the stuff from the. If we can just put in the dates, we can make it a read only field or we can put a date signed here and we can just put dates signed underneath it for the person. This is the signature of the principal. So the principal signs this. Ok, so now that we scroll down here, we want to fill all this in. These are radio buttons because these are optional, so we want to. But then these are all required. So we want to go here. And you want to go like this and then just keep on adding on these radio buttons by clicking the plus here like this? And for this, it’s asking for a check mark, so go to check box and fill in the check boxes here.
Speaker1: [00:09:41] You just go like this and click paste. And paste this here. Make sure everything fits decently. Do you notice that I’m basically making the things that are optional like non required? So you want to make this go a bit longer to there’s more down here. And this is a big, optional text field to put text. Put it here. Make it big. Make it optional for peace in it. We’re highlighting it like this and then we’re making it’s not required. It’s the name of the subscriber. So this is from the full name, if we remember from before. So you want to go all the way up and I look at full name. I’m going to copy this. Now you want to go all the way down. They’re here. And so you just want to paste this and then you want to say full name, you want to remove all the gibberish behind it and you want to put the signature here. I put the title. Title four actually know what you want to just yeah, we can put it in the title here. The dates? We could have used this, but the text field does the same thing, and we want to put the dates next. We’re not done. So this is all optional. The reason why it’s optional is because, like it’s only if part see and effort or so.
Speaker1: [00:14:15] So for this, you’re going to see this, especially in Canada, but ninety nine percent of the time, it’s really only Jake like Jake and I. So it’s usually all this. Jake and I usually do these ones, so everything else is usually a waste of time. But just for the sake of simplicity, we’re going to do them all in terms of filling out the dark thing. So, yeah, we’re just going to go like this. Make this not required. Let’s make sure it’s the same as the one above. Yeah. Ok. And so here you want to put in the amounts. And you want to put in the initials. The initials are required. Here, this one is tricky, so then here you have to make sure that’s the only sign one of these things. And so the way you want to do it, you want to click on, you want to make it a radio button. And then after this, you want to make sure that there’s a bit of logic. And so you want to add the. You want to add the what’s it called? Yeah, you want to put the initial fields next to it, it’s like this. Initially, fields here aren’t required. It’s basically the radio buttons make the initial fields appear because you can only pick one of these things, so you want to create a rule. So when they select this, you have to make this one appear. That’s a radio for. It’s radio 4 this one.
Speaker1: [00:18:59] So conditional logic create rule, so Radio three hides this one. Radio two. Radio two hides this one and Radio three. Radio three hides this one where Radio one has its title. So, yeah, you just want to do that to make it to show or hide, and I think you can make them all required, actually. But just for safety’s sake, let’s keep them off, and then let’s make a big text saying, let’s make a big radio button here saying in the room with this one saying. United signed one of the fields, and let’s make this in in red. So do we want to do what you want to have the conditional or to create rule so high, so show this on Radio one and also make this required? Yep. And then make this read only and not require field. There we go. And then that should work. So now first and last names, so go here. Click on this, go here and click on full name. It commits black again and not bald. And we want to say this is full name and put signature here as well. They signed here, the salesperson completes this, so I mean, we can actually get it the salesperson to do this right now and just say, oh, first and last name. So this is his full name telephone. And is this the last thing after this, after that, OK, this is the only thing that gets to in an email. Let’s just keep this. We can just keep this like not required in terms of we can make it not required just for simplicity sake, because the salesperson seems to be the same as the principal.
Speaker1: [00:22:00] So let’s just keep it the same. And here, yeah, just fill to fill all this in. It’s when it’s fun. So you want to go. Mr. Of these are radio buttons. Oops! So just go. Text first name, Typekit first sign, it’s the best because it allows you to just copy and paste things very easily and whoops, this is not in the text. This is actually in the. Address. Put this in the city. So see, I just don’t make the phone numbers required because some people may not have any of these or whatever, they may just have a cell phone, but just don’t make make the cell phone required and then leave the other ones is not required and don’t make facts required. Not everybody has a spouse. So don’t make the spouse required because not everybody has a spouse, you want to put this here. If we here, not everybody has an employer to make this as optional. All right. So then do radio buttons for these. Radio buttons for these. And now you also want to have an upload field for a driver’s license or a piece of ID. And so the way you want to do it, you want to go to the. It’s attachments, and then you want to have a make it required and you want to put a note here and a note should say.
Speaker1: [00:26:40] Upload drivers license. At sports or other government issued I.D. And so you want to do that so that because it shows that you’ve done your research and it’s not, it’s AML compliance and all that. And so that’s it. And so we want to click on next now and make sure everything is safe. So you want to click on next. You want to click on, scroll down and just make sure everything is right and you want to make sure you test this before you send it to the investor, obviously, but you want to click on save templates and Canadian subscription agreements. And then there we go. And so what you want to do? You can do a few things with this so you can click on use. It’s actually quite a few things you can do with this. So you can click on use. And before I click on use, I recommend just creating a copy for backup, just for safety just before you play, when you just suffered to make or got your system to make, you know, I just create like a copy of it’s for safety purpose, but. Let’s see if there’s a faster way to create a copy of it. He’s already create a copy. And so now you can click on use. There you go. And so that’s it, and then what do you have to do to be like the subscriber? You’re answering the email of the subscriber. So it’s like investor like investor at raises.com Or sorry like investor name an investor and raises.com so like the investor name could be Joe and an investor, it reads the common principles like me and raises our or it’s like not to.
Speaker1: [00:29:03] And then it could be like me at Raises.com. And then and then that’s it. Or, you know, and then that’s it. Then click Send and then add a message to the recipient so that they get this message. And then that’s generally it’s they would get it, and then they would follow the instructions on a dark side to finish it off. But before you do that, obviously you want to test it with yourself. You want to send it to your own emails for and walk through everything step by step to make sure that this works in your situation. And. When you click share with the users, you may actually be able to share it with people I work in at DocuSign accounts to play with. And that’s pretty much it. And then with that, you should be able to set up an automated investor attraction and congratulations if you follow all these steps. You now have your investor intake form automated and so go have fun and go raise some money here. Good job and staying with us and staying through this process because very few make it to this point. And you know, you’re now in the top one percent of people who are doing this type of work. So congratulations on getting this esoteric knowledge and let’s apply it and get some success and win together.